
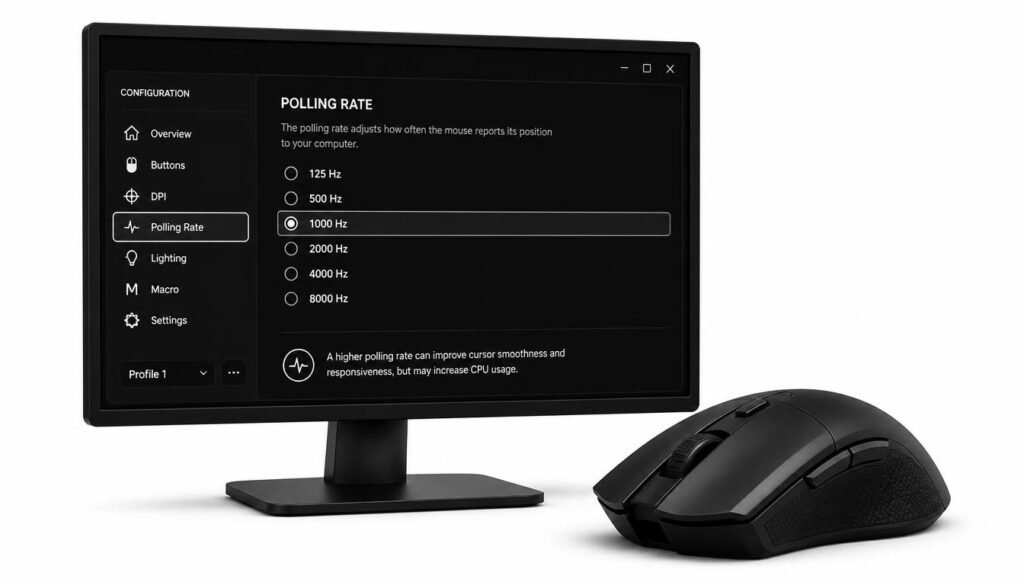
How to change polling rate on mouse depends on the mouse brand and software it uses, but the process is usually simple. Most gaming mice let you change the polling rate through their companion software, such as Logitech G HUB, Razer Synapse, or another manufacturer utility.
In this guide, you’ll learn what mouse polling rate means, where to change it, which polling rate you should use, and what to do if the setting is missing.
Table of Contents
What Is Mouse Polling Rate?
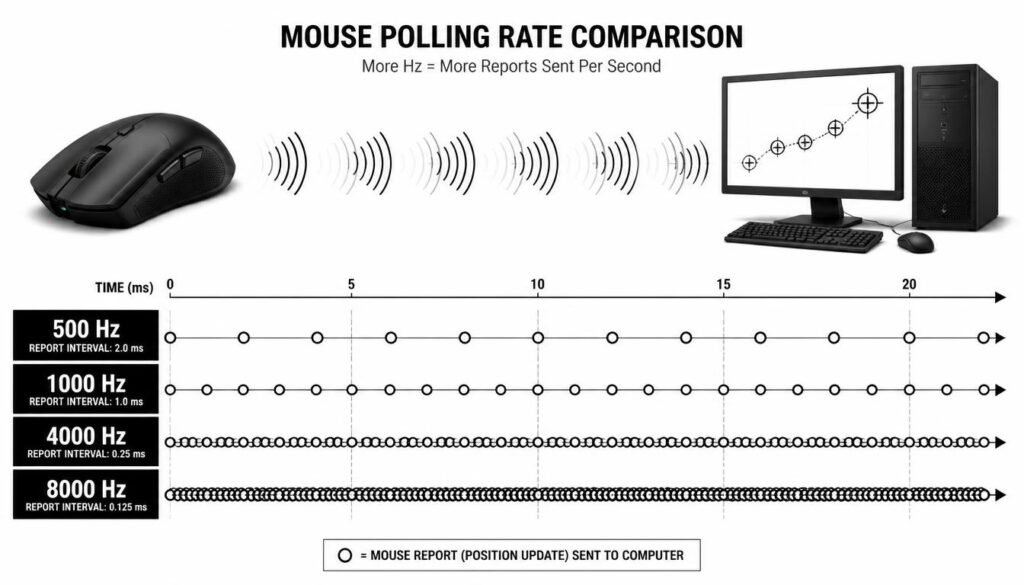
Mouse polling rate is how often a mouse reports its position to your computer, measured in Hertz (Hz). A 1,000 Hz polling rate means the mouse can report its position up to 1,000 times per second.
The polling rate is also called the report rate on some mice. For example:
| Polling Rate | Report Interval |
|---|---|
| 125 Hz | 8 ms |
| 250 Hz | 4 ms |
| 500 Hz | 2 ms |
| 1,000 Hz | 1 ms |
| 2,000 Hz | 0.5 ms |
| 4,000 Hz | 0.25 ms |
| 8,000 Hz | 0.125 ms |
A higher polling rate can reduce the time between mouse reports. However, the highest available setting is not automatically the best choice for every PC or every user.
How to Change Polling Rate on Mouse
The easiest way to change polling rate on mouse is to open the manufacturer’s mouse software, select your device, find the Polling Rate, Report Rate, or similar setting, and choose the desired value.
Here are the most common methods.
1. Change Polling Rate on a Logitech Mouse
For many Logitech gaming mice, you can change the USB report rate through Logitech G HUB.
- Connect your Logitech gaming mouse to the PC.
- Open Logitech G HUB.
- Select your mouse.
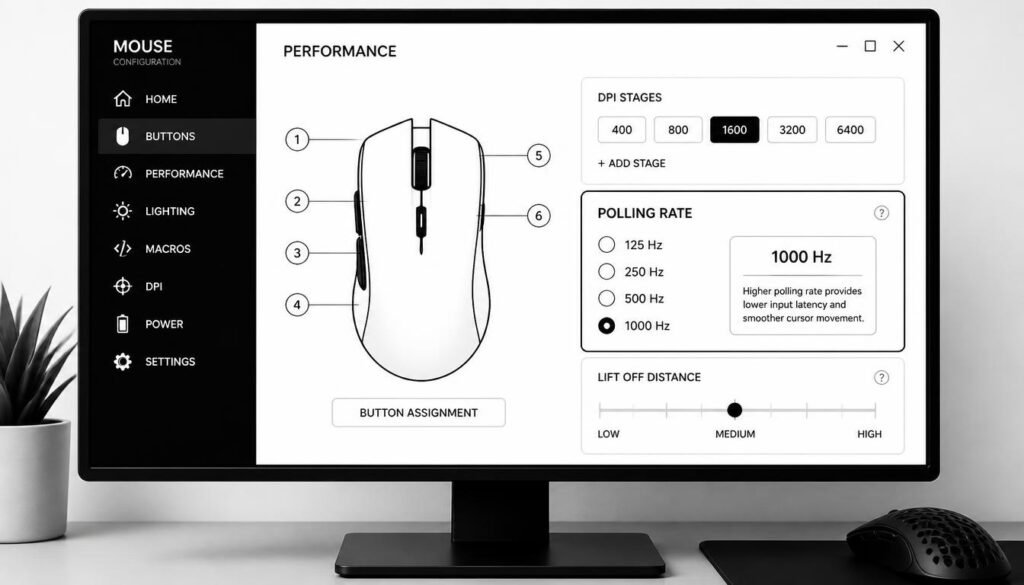
- Open the Performance section.
- Select Report Rate.
- Choose the polling/report rate you want.
- Save the setting or profile if required.
Logitech’s current G HUB support documentation places the USB report-rate control under Performance → Report Rate.
Keep in mind that available settings depend on the specific mouse. Some wireless Logitech models also use different power modes that can affect the report rate. For example, Logitech documents some models with 125 Hz, 250 Hz, 500 Hz, and 1,000 Hz options depending on the selected mode.
2. Change Polling Rate on a Razer Mouse
Razer mice generally use Razer Synapse for polling-rate controls.
- Open Razer Synapse.
- Select your mouse.
- Go to the Performance tab.
- Find Polling Rate or Ultrapolling Rate.
- Select the rate you want.
- Apply the change if the software asks you to.
Razer’s support instructions specifically direct users to select the mouse, open Performance, and choose the desired rate under the polling-rate section.
Some newer Razer mice support much higher polling rates than the traditional 1,000 Hz setting, but the available choices depend on the exact model and its hardware.
3. Change Polling Rate on a Corsair Mouse
Corsair gaming mice use iCUE for many device settings, including polling-rate controls on supported models.
The exact menu can vary by mouse and iCUE version, so open your mouse inside iCUE and look for its performance or device settings.
Corsair documents support for higher polling rates on compatible mice and notes that higher rates can place greater demands on the system. For example, Corsair recommends more capable hardware for 4,000 Hz and 8,000 Hz operation.
4. Change Polling Rate on Other Gaming Mice
Other brands may use their own configuration software. Look for a setting named:
- Polling Rate
- Report Rate
- USB Report Rate
- Response Rate
- Hz
- Performance
If you cannot find any of these settings, your mouse may have a fixed polling rate or may only allow changes through a hardware switch, button, receiver, or firmware utility.
Can You Change Mouse Polling Rate in Windows?
Usually, Windows does not provide a standard mouse polling-rate slider.
Windows has settings for things such as mouse pointer speed and other mouse behavior, but the polling rate is generally controlled by the mouse firmware or the manufacturer’s software.
That means changing the polling rate normally requires the utility made for your mouse.
This is different from your monitor’s refresh rate. Windows provides a built-in control for display refresh rate, but that does not change your mouse polling rate. Microsoft’s Windows documentation describes display refresh rate as a separate display setting.
What Polling Rate Should You Use?
For many users, 1,000 Hz is a practical starting point. It provides frequent mouse reports without requiring the higher system workload associated with very high polling rates.
If your mouse supports 2,000 Hz, 4,000 Hz, or 8,000 Hz, you can test those settings and see whether your system and games behave well.
A simple approach is:
- 125–500 Hz: Good for basic use and some lower-power wireless setups.
- 1,000 Hz: A common choice for gaming and general use.
- 2,000–4,000 Hz: Useful to test on a modern gaming PC.
- 8,000 Hz: Best treated as an enthusiast/high-performance option that requires compatible hardware and software.
Higher is not always better in every situation. The practical difference becomes smaller as polling rate increases, while the amount of mouse data being processed increases.
Does a Higher Polling Rate Reduce Input Lag?
Yes, a higher polling rate can reduce the maximum interval between mouse reports.
For example, a 500 Hz mouse reports every 2 milliseconds, while a 1,000 Hz mouse reports every 1 millisecond. A 4,000 Hz mouse reduces that interval to 0.25 milliseconds.
This does not mean your total system input latency is reduced by exactly the same amount. Your mouse, USB connection, CPU, game engine, frame rate, display refresh rate, and other parts of the system also contribute to overall latency.
For that reason, changing from 1,000 Hz to 8,000 Hz should not be viewed as an automatic performance upgrade for every PC.
Polling Rate vs. DPI: What’s the Difference?
Polling rate and DPI control different aspects of mouse behavior.
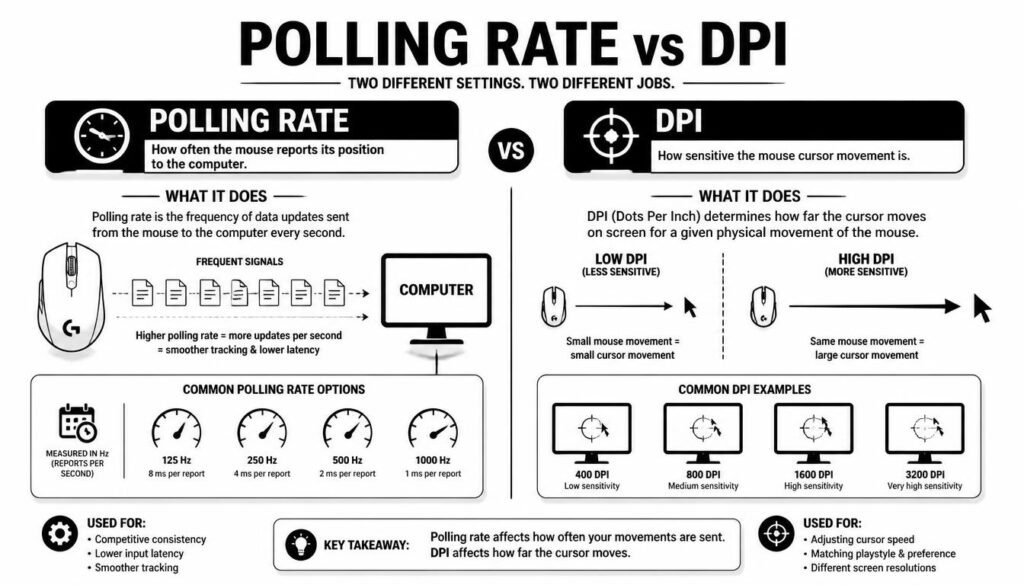
DPI describes how sensitive the mouse is to physical movement. A higher DPI means the cursor can move farther for the same physical mouse movement.
Polling rate describes how frequently the mouse reports its position to the computer.
For example, you could use:
800 DPI + 1,000 Hz polling rate
or
800 DPI + 4,000 Hz polling rate
The DPI stays the same, but the frequency of reports changes.
Changing polling rate does not directly change your mouse sensitivity.
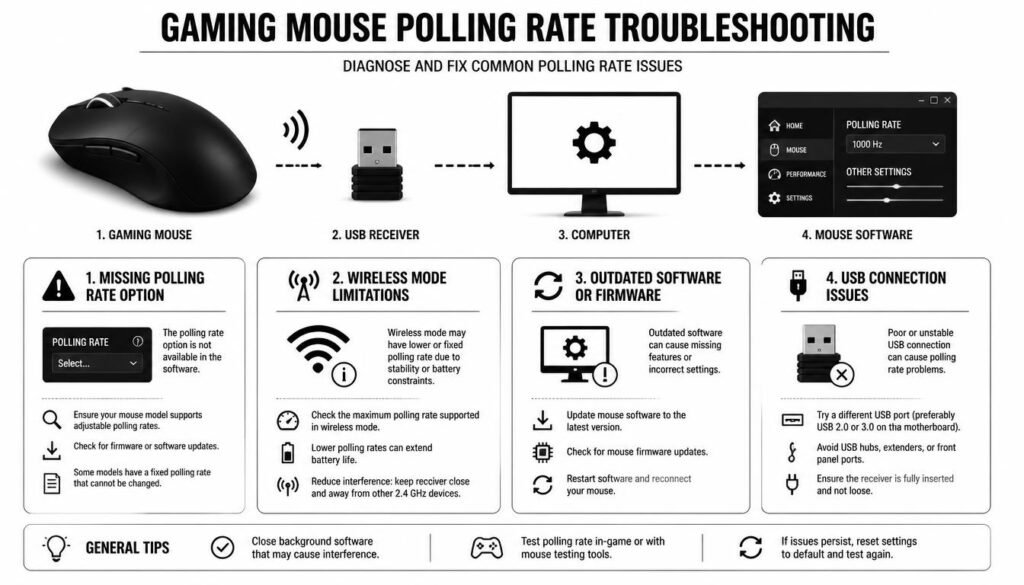
Why Can’t I Find the Polling Rate Setting?
There are several possible reasons.
Your mouse does not support adjustable polling rates
Some basic or older mice use a fixed report rate. In that case, there may be no software setting to change it.
You are using the wrong software
A mouse may require its own configuration program. Check the manufacturer’s support page for the exact model.
Your wireless connection limits the setting
Some wireless mice support higher polling rates only with a particular receiver or connection mode. Logitech, for example, documents models where Bluetooth operation fixes the report rate at 125 Hz while a dedicated receiver allows higher performance.
Your mouse is in a battery-saving mode
Wireless mice may lower the report rate to improve battery life. Logitech documents this behavior for some models, where endurance mode is fixed at 125 Hz while performance mode provides additional report-rate options.
Your software or firmware is outdated
Install the current version of your mouse manufacturer’s software and check for firmware updates supported by your model.
How to Check Your Mouse Polling Rate
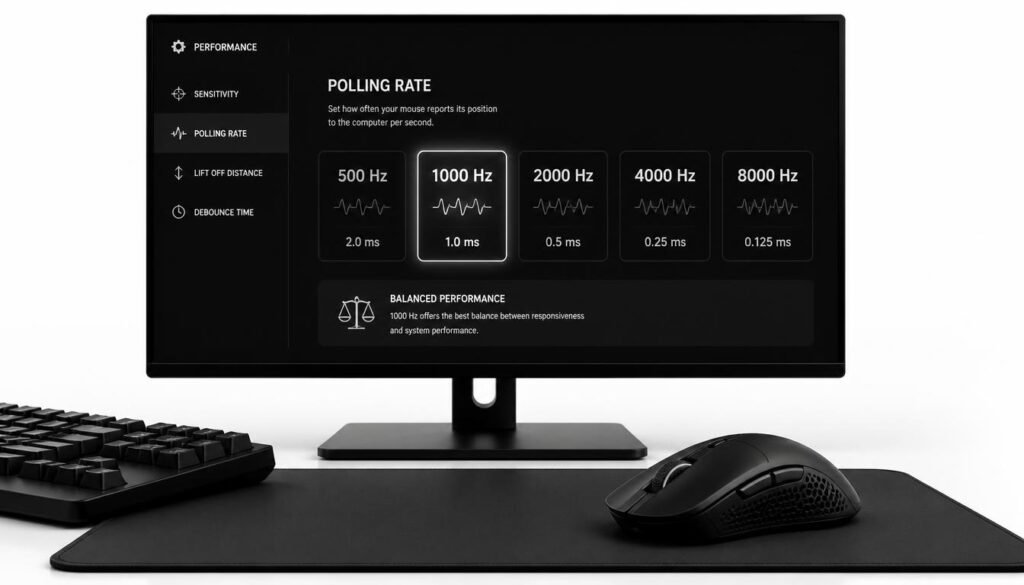
You can check the setting inside your mouse software first. This is generally the best place to confirm what you’ve selected.
You can also use a mouse polling-rate testing tool, but results from browser-based tests should not always be treated as exact measurements, especially with very high polling rates.
Logitech specifically warns that third-party and browser-based polling-rate tests can show lower or fluctuating results, particularly with high-report-rate mice.
So, if your software is set to 4,000 Hz but an online test shows a different number, that does not automatically mean your mouse is malfunctioning.
Does 8,000 Hz Polling Rate Use More CPU?
It can increase the amount of data your PC has to process because the mouse is sending reports much more frequently.
This is one reason manufacturers place hardware requirements or recommendations around higher polling rates. Corsair, for example, lists stronger minimum processor recommendations for 4,000 Hz and 8,000 Hz operation on supported devices.
If you notice unusual frame-time behavior, stuttering, or compatibility problems after selecting an extremely high polling rate, try stepping down to 2,000 Hz or 1,000 Hz.
What Is the Best Polling Rate for Gaming?
For most gamers, 1,000 Hz is a sensible baseline.
Competitive players with modern hardware may want to experiment with 2,000 Hz, 4,000 Hz, or 8,000 Hz when their mouse supports those rates. The best setting is the one that provides stable performance without introducing unwanted system overhead or compatibility issues.
Your game, CPU, USB setup, mouse, and monitor all matter, so testing two or three settings is more useful than assuming the highest number must be best.
Common Mistakes When Changing Polling Rate
One common mistake is confusing polling rate with DPI. Increasing DPI makes the cursor respond to less physical movement; increasing polling rate changes how frequently the mouse reports its position.
Another mistake is choosing the highest polling rate simply because it is available. A very high setting can be unnecessary for a particular setup, especially if your PC or game does not benefit from it.
It is also worth checking your connection. Corsair recommends connecting compatible high-polling-rate devices to a USB port directly linked to the motherboard chipset instead of relying on hubs, docks, or third-party USB chipsets when stability is a concern.
Frequently Asked Questions
How do I change polling rate on mouse?
Open your mouse manufacturer’s software, select your mouse, find the Polling Rate, Report Rate, or USB Report Rate setting, and choose the desired Hz value. Logitech, for example, provides this control in G HUB under Performance → Report Rate, while Razer provides it in Synapse under Performance.
What is a good polling rate for a mouse?
A 1,000 Hz polling rate is a practical choice for most gaming and everyday use. Higher rates can be tested on compatible modern systems, but they are not necessary for everyone.
Is 1,000 Hz better than 500 Hz?
A 1,000 Hz mouse reports twice as often as a 500 Hz mouse, reducing the report interval from 2 ms to 1 ms. Whether you notice a meaningful difference depends on your setup and use case.
Does polling rate affect FPS?
Polling rate does not directly increase your graphics FPS. However, very high polling rates can increase the amount of mouse input your system processes, so the effect on overall performance can vary by hardware and software.
Can I change polling rate without software?
Sometimes. Certain mice have hardware controls, onboard profiles, switches, or dedicated receiver settings. However, many gaming mice require the manufacturer’s software.
Does a higher polling rate make a mouse more accurate?
Not necessarily. Polling rate determines how frequently the mouse reports its position. Sensor quality, tracking performance, DPI, surface, firmware, and other factors also affect how accurately a mouse tracks movement.
Is 4,000 Hz or 8,000 Hz worth it?
It depends on your mouse, PC, games, and preferences. Higher polling rates can reduce the interval between reports, but the improvement over 1,000 Hz becomes progressively smaller while system demands can increase.
Why does my mouse polling rate keep changing?
Some mice dynamically adjust their report rate based on usage, connection mode, or power settings. This is particularly common with wireless mice designed to balance performance and battery life. Logitech, for example, documents dynamic or power-mode-related report-rate behavior on some G-series models.
Conclusion
Learning how to change polling rate on mouse is usually a matter of opening your mouse’s configuration software and selecting the appropriate report-rate setting. Logitech users can look under G HUB’s Performance settings, while Razer users can find the control in Synapse’s Performance section.
For most people, 1,000 Hz is a solid starting point. Higher polling rates can be useful on compatible hardware, but the best setting is the one that gives you stable, responsive mouse movement without unnecessary system load.